01 - 实时阴影
开始写GAMES202的作业~(虽然是边看攻略边写的)
实现Shadow Map
原理
Shadow Map需要两个Pass完成:
- 以光源为视角看向物体,记录它看到场景的深度信息,即Shadow Map
- 以摄像机为视角进行渲染,根据Shadow Map的深度信息和当前点(转换到光源视角)的深度信息作比较,如果Shadow Map的深度信息比较浅,说明该点是阴影。
实现CalcLightMVP()
有关mat4的API可在这里查看,要对光源进行MVP变换,就得计算出它的MVP矩阵:
// DirectionalLight.js
CalcLightMVP(translate, scale) {
    let lightMVP = mat4.create();
    let modelMatrix = mat4.create();
    let viewMatrix = mat4.create();
    let projectionMatrix = mat4.create();

    // Model transform
    mat4.translate(modelMatrix, modelMatrix, translate);
    mat4.scale(modelMatrix, modelMatrix, scale);

    // View transform
    mat4.lookAt(viewMatrix, this.lightPos, this.focalPoint, this.lightUp);

    // Projection transform
    mat4.ortho(projectionMatrix, -100, 100, -100, 100, 0.01, 200);

    mat4.multiply(lightMVP, projectionMatrix, viewMatrix);
    mat4.multiply(lightMVP, lightMVP, modelMatrix);

    return lightMVP;
}
实现useShadowMap()
useShadowMap()负责查询当前着色点在 ShadowMap 上记录的深度值,并与转换到 light space 的深度值比较后返回 visibility 项。
不过在实现这个函数之前,先要对传进来的shadowCoord坐标进行标准化:
// phongFragment.glsl
void main(void) {
    // 对传进来的坐标进行标准化
    // (wx, wy, wz, w) -> (x, y, z, 1 or -1), x,y in [-1, 1]
    vec3 shadowCoord = vPositionFromLight.xyz / vPositionFromLight.w;
}接下来就能实现useShadowMap()了:
// phongFragment.glsl
float useShadowMap(sampler2D shadowMap, vec4 shadowCoord)
{
    // [-1, 1] -> [0, 1]
    shadowCoord = vec4(shadowCoord.xyz * 0.5 + 0.5, 1.0);

    float depth = unpack(texture2D(shadowMap, shadowCoord.xy));
    float cur_depth = shadowCoord.z;
    float isVisable = (cur_depth <= depth + EPS) ? 1.0 : 0.0;

    return isVisable;
}
解决Shadow Acne问题
直接运行后的效果如下,不是很理想,出现了自遮挡现象,这就是之前提到的Shadow Acne问题(不是摩尔纹哦):
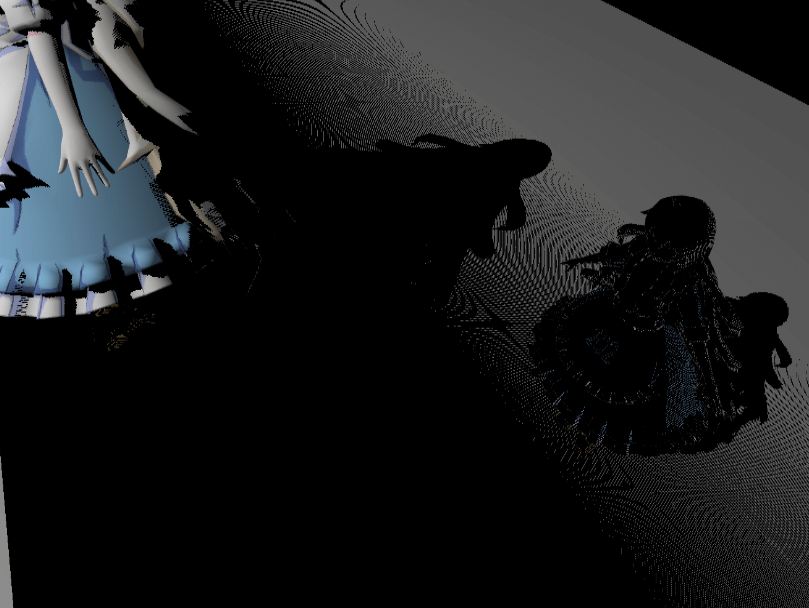
为了解决Shadow Acne问题,需要给cur_depth或depth添加偏移量bias。如果只是添加一个固定值,还会产生漏光问题,因此bias得是自适应的。
LearnOpenGL中给出的公式如下,它让bias值与光照方向和法线相关:
// phongFragment.glsl
vec3 normal = normalize(vNormal);
vec3 lightDir = normalize(uLightPos - vFragPos);
float bias = max(0.05 * (1.0 - dot(normal, lightDir)), 0.005);

float isVisable = (cur_depth - bias <= depth + EPS) ? 1.0 : 0.0;
教程则给出了如下计算方式,更加细节:
float getShadowBias(float c, float filterRadiusUV){
    vec3 normal = normalize(vNormal);
    vec3 lightDir = normalize(uLightPos - vFragPos);
    float fragSize = (1. + ceil(filterRadiusUV)) * (FRUSTUM_SIZE / SHADOW_MAP_SIZE / 2.);
    return max(fragSize, fragSize * (1.0 - dot(normal, lightDir))) * c;
}
其中c是可调节的最终系数,filterRadiusUV是当使用PCF时考虑PCF的采样范围。
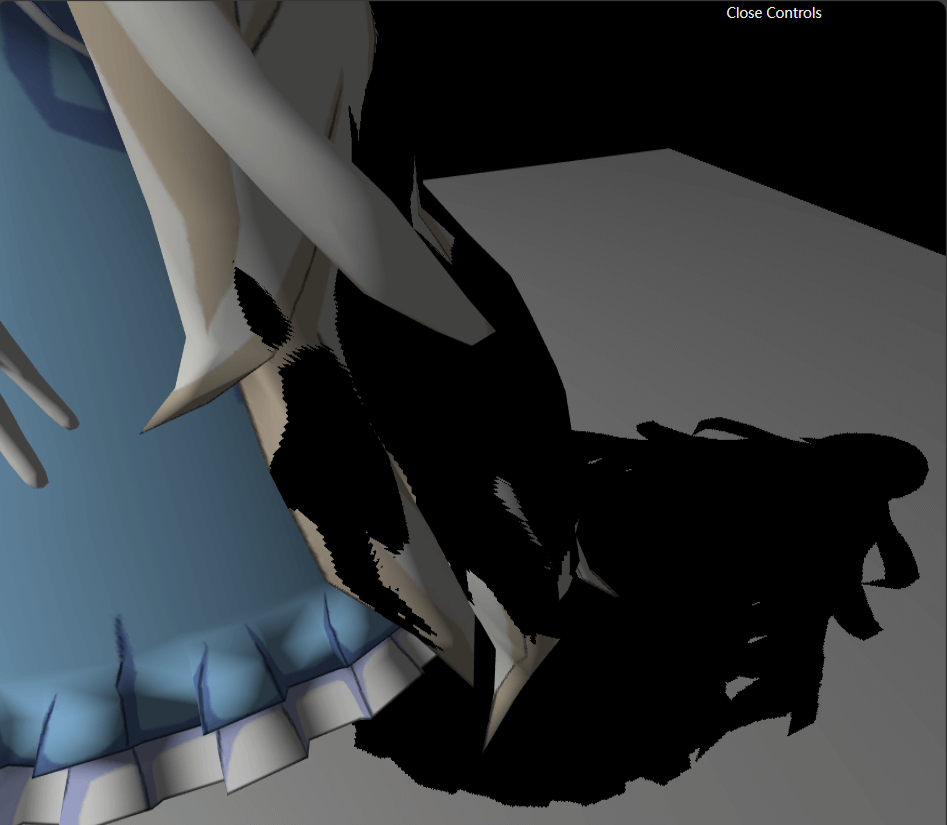
解决Shadow Acne问题后的结果如下:
实现PCF
观察上方的结果,容易发现阴影边缘有锯齿状走样现象。这是因为ShadowMap是有分辨率的,也会因为精度问题产生走样,这里使用PCF来缓解走样问题。
PCF的思想就是在深度贴图中进行多次采样,将采样结果取平均作为最终结果。
采样
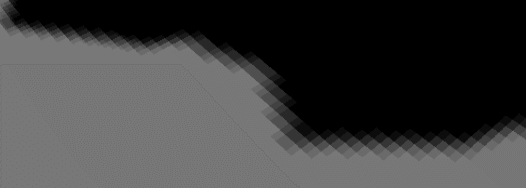
首先试试最简单的采样,取像素点及其周围的8个点采样:
// phongFragment.glsl
float PCF(sampler2D shadowMap, vec4 coords) {
    vec4 shadowCoord = vec4(coords.xyz * 0.5 + 0.5, 1.0);
    float isVisable = 0.0;
    float cur_depth = shadowCoord.z;

    // use 3x3 kernel
    float texelSize = 1.0 / SHADOW_MAP_SIZE;
    float bias = getShadowBias(0.2, texelSize);
    for (int x = -1; x <= 1; ++x)
    {
        for (int y = -1; y <= 1; ++y)
        {
            float depth = unpack(texture2D(shadowMap, shadowCoord.xy + vec2(x, y) * texelSize));
            isVisable += (cur_depth - bias <= depth + EPS) ? 1.0 : 0.0;
        }
    }
    isVisable /= 9.0;

    return isVisable;
}
结果如下:
然后就是作业要求的泊松圆盘采样(蓝色)和均匀圆盘采样(红色)了:
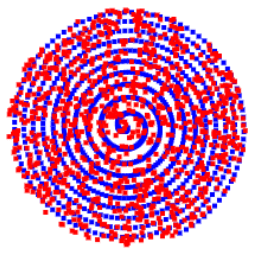
代码如下:
// phongFragment.glsl
float PCF(sampler2D shadowMap, vec4 coords) {
    vec4 shadowCoord = vec4(coords.xyz * 0.5 + 0.5, 1.0);
    float isVisable = 0.0;
    float cur_depth = shadowCoord.z;
    float texelSize = 1.0 / SHADOW_MAP_SIZE;
    float bias = getShadowBias(0.2, texelSize);

    // 使用泊松圆盘采样
    poissonDiskSamples(shadowCoord.xy);
    // 使用均匀采样
    // uniformDiskSamples(shadowCoord.xy);
    for (int i = 0; i < NUM_SAMPLES; ++i)
    {
        vec2 offset = poissonDisk[i] * texelSize;
        float depth = unpack(texture2D(shadowMap, shadowCoord.xy + offset));
        isVisable += (cur_depth - bias <= depth + EPS) ? 1.0 : 0.0;
    }
    isVisable /= float(NUM_SAMPLES);

    return isVisable;
}
结果如下:
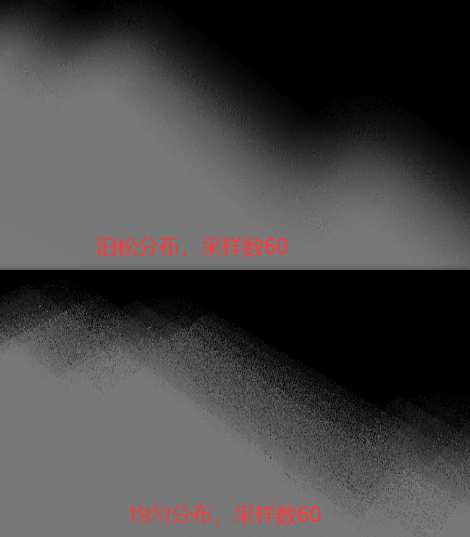
可见泊松圆盘分布的结果更合理一些。
软/硬阴影
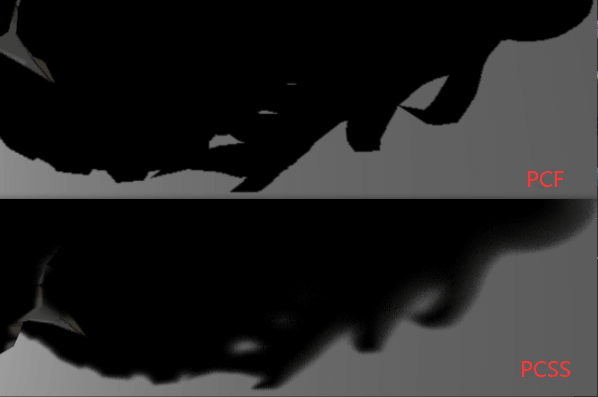
PCF采样的范围越大,阴影就越”软“。上面的结果都是硬阴影,这里将texelSize变大,让结果呈现软阴影:
// phongFragment.glsl
float texelSize = 5.0 / SHADOW_MAP_SIZE;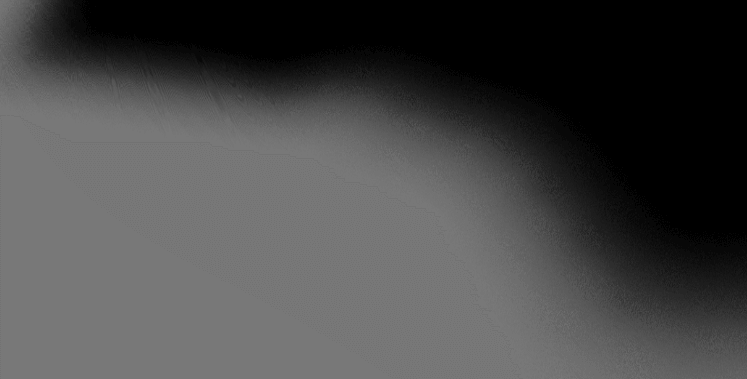
实现PCSS
实际上在真实的光照下,离遮挡物越近的阴影越硬。为了让结果更真实,接下来开始实现PCSS。
实现findBlocker()
这一步需要在ShadowMap中开辟一块特定区域,求出遮挡物的平均深度
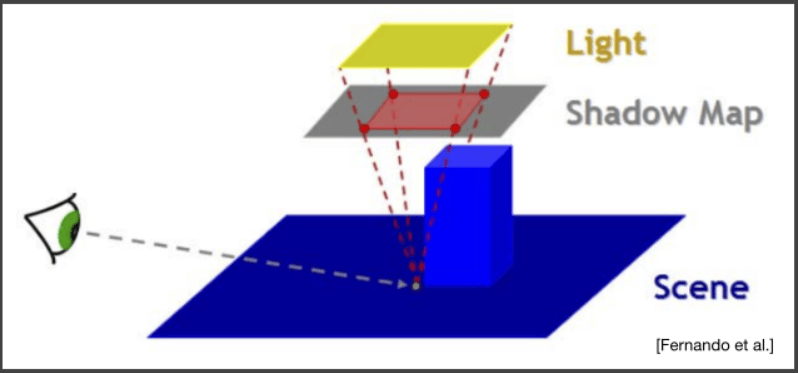
红色部分就是特定区域的大小,为了求它得先定义如下变量:
// phongFragment.glsl
#define NEAR_PLANE 0.01
#define LIGHT_WORLD_SIZE 5.0
#define LIGHT_UV_SIZE LIGHT_WORLD_SIZE / FRUSTUM_SIZE其中,NEAR_PLANE和FRUSTUM_SIZE是光源视角的视锥体相关信息;LIGHT_WORLD_SIZE是自定义的光源大小,越大阴影就越软;LIGHT_UV_SIZE是在ShadowMap上采样的1纹素大小。
然后就能用相似三角形关系求出特定区域的大小了:
// phongFragment.glsl
float sampleSize = LIGHT_UV_SIZE * (zReceiver - NEAR_PLANE) / zReceiver;
接下来进行随机采样,求
// phongFragment.glsl
int blockerCnt = 0;
float blockerDepth = 0.0;
poissonDiskSamples(uv);
for (int i = 0; i < NUM_SAMPLES; ++i)
{
    vec2 offset = poissonDisk[i] * sampleSize;
    float depth = unpack(texture2D(shadowMap, uv + offset));
    if (depth < zReceiver)
    {
        blockerCnt++;
        blockerDepth += depth;
    }
}

if (blockerCnt != 0)
    return blockerDepth / float(blockerCnt);
else
    return -1;
求penumbra
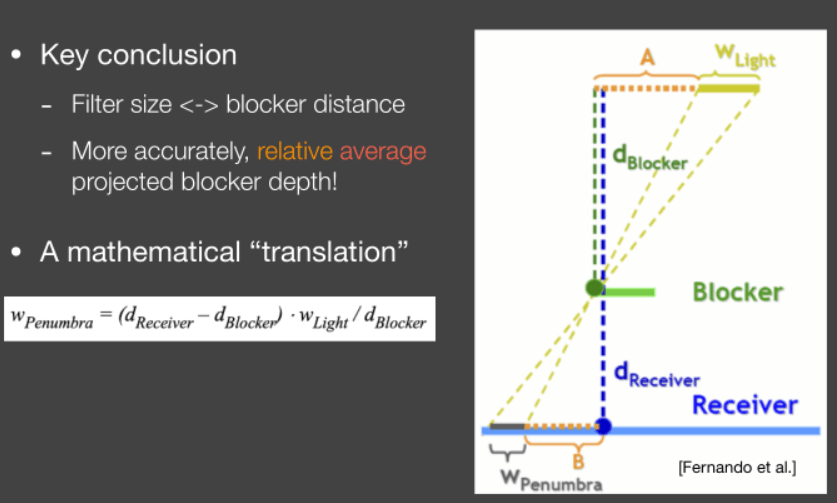
PCF的采样大小
// phongFragment.glsl
float w_penumbra = (zReceiver - avgblockerDepth) * LIGHT_UV_SIZE / avgblockerDepth;
然后进行PCF即可,这里改了下PCF的接口,让它接收
// phongFragment.glsl
return PCF(shadowMap, coords, w_penumbra);
最终效果如下:
参考资料
- GAMES202: 高质量实时渲染 (ucsb.edu)
- GAMES202-作业1:实时阴影 - 知乎 (zhihu.com)
- JSDoc: Home (glmatrix.net)